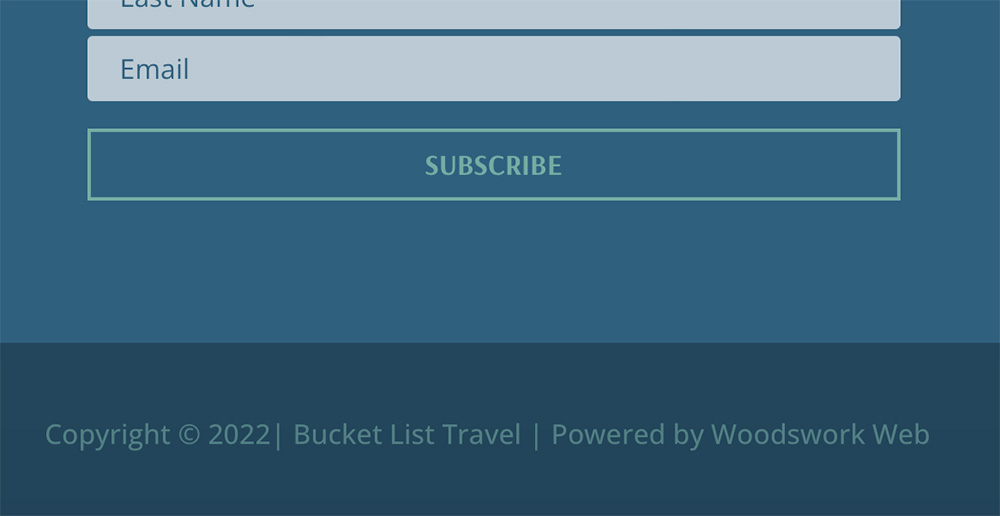
When we use the Divi Builder to create a custom layout the bottom bar dissapears. We can easily create a new bottom bar but getting the date to auto update is a bit more involved.
Luckily Divi have added dynamic content fields to their bag of trick so we are good to go. Here is how we do it.
How to make a dynamic date in Divi
Head to the black side bar on the left hand side. Close to the bottom you’ll see Divi.
Hover over Divi and you’ll see a few options to choose from.
We want to select Theme Builder.
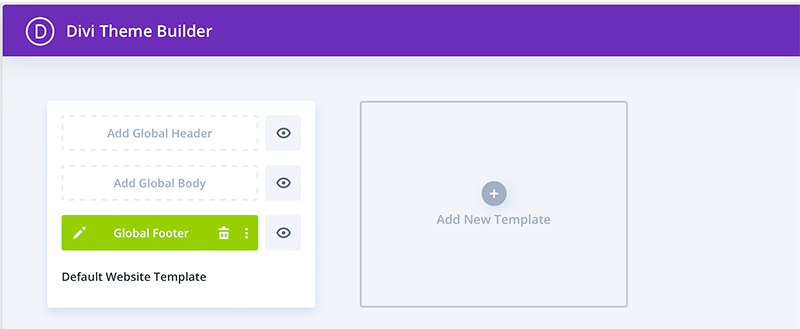
Once you’re in the Theme Builder you can see at least one template. There may be nothing on it. Or if you have created a customised footer you will see it there. Out of the box WordPress adds widget areas for you to add content into for the footer. These areas take a little more effort to design. So the powerful Theme Builder options Divi gives us now are a fantastic way to help you design any footer you can imagine.
As you can see we have already begun to create a footer. When anything is added to the first template it will be Global and added to the whole site. You can assign exclusions if you wish to add a different footer elsewhere.
Creating a backlink to another site in the bottom bar
If you don’t already have a global footer go ahead and create one. If you do, the next thing we need to do is edit the global footer. Click on the pen and the Global Footer layout and a new window will open. This is where you’ll build your footer and create a new bottom bar. As you can see we have a layout already and just need to create a new copywrite area and link back to our website. Find out why we use this method to create links from our web work back to our website.
Next click on the blue plus circle button to add a new section. Select the row configuration you are wanting to include. We are using two columns with one short column on the left for social icons. We then added a text field into the first column. Then select the dynamic content field icon.
This opens a list of dynamic content that you can use for your text content. Select Current Date.
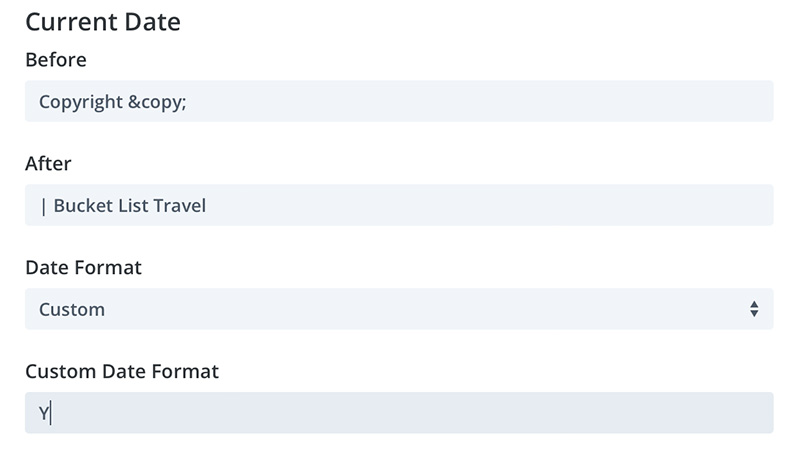
A box will open and in the before field we added ‘Copyright ©’ and then a space.
Then we edit the date format to only include the year. Select the Custom Date Field and add ‘Y’.
In the After field we usually ad the name of the company like ‘| Company’.
We go a little step further and create a backlink to our Woodswork Web site.
Powered by <p><a href=”https://www.woodswork.co.nz” target=”_blank” rel=”noopener”><span>Woodswork Web</span></a></p>
If you’d like to be able to do this too, you could change out the code above to include your name and link.
Another way to do this is to add a new text box > type your name > add the link > select it to open in a new window.
Then select the ‘Text’ view instead of the ‘Visual’ view.
That’s it, now you can go ahead and style the copywrite bar exactly how you want it.


