Adding and/or editing a Divi toggle module
To begin adding or editing toggled content in the Divi toggle module on your website Login to your website using your user name and password.
You can edit pages in two different ways. The first way is through the page list in the Pages area of your dashboard. The second way is by using the front-end editor.
Editing pages via the dashboard
Head to the black menu on the left of the dashboard. Select Pages and look for the page you want to edit. Select the page or post to be edited by clicking the title of the page or clicking on edit.
Editing pages via the front-end editor
On the top left-hand side of the dashboard, you will see your website name. Click on that to see the front end of your website. Navigate to the page you are wanting to edit. In the black bar above the page you should see a purple circle with a ‘D’ on it. Click on Enable Visual Builder. You may see spinning dots, these indicate the page is about to open.
Editing the Divi toggle module
A toggle module can be handy in areas where you have a lot of content and want to condense it into a smaller area. If you have an FAQ section or page on your website we will most likely have added the content using toggles.
Editing toggles is as simple as editing a text box. Click on the cog icon of the module you want to edit. A Settings box will open and you will be able to edit the text under the Content tab.
There is an area for the general text and also an area for the heading.
If your site has a Divi toggle module already you can duplicate them.
How to duplicate an existing toggle module
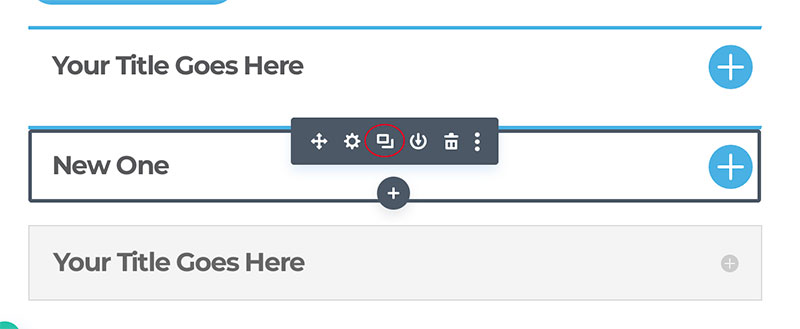
Hover over an existing module and click on the icon that looks like pages as circled below.
This will duplicate the module.
Click the cog icon to add the new title and body content.
Edit the module and SAVE in the bottom right corner.

